Bedroom Renovations
18 tips for how to paint your kitchen
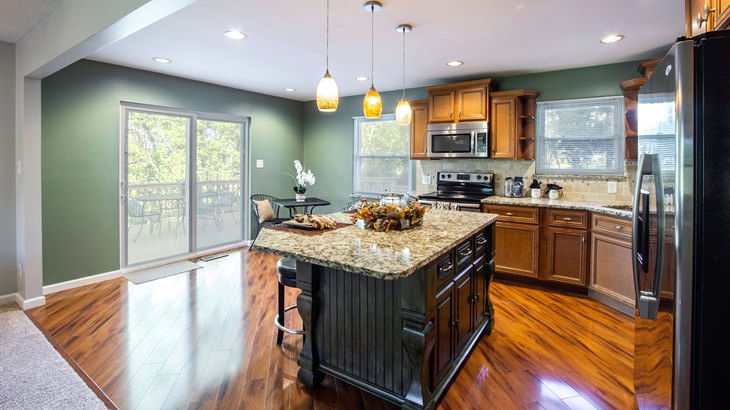
Are you planning to repaint your kitchen? These tips will help you get your dream kitchen. Ensure you engage the services of a professional kitchen painter from ServiceSeeking.com.au
Oliver Pennington
Jan 25, 2018
Painting the kitchen is easier than painting the living room or bedroom. While it may seem easier to paint the kitchen, it involves a lot of preparation work and cleaning for the surface to be ready for painting. Sometimes, doing this work yourself is not the best way to get value for money. You are well advised to hire a professional painter.
Getting your paint job done by a qualified and reliable tradesman will give you value for money. ServiceSeeking.com.au is a reliable database where you can get local painters who are ready to provide you with top-notch house painting services. What’s more, getting quotes from them is just a few clicks away. Try them today!
Thus, below are a few tips that will help you paint your kitchen professionally.
1. Wood is Easier to Paint
Any surface that you can scuff up with sandpaper so that the paint adheres better is suitable for painting. Wood is much easier to paint when it is stained and sandpapered. It is important to remember that stained wood and glossy finish must first be de-glossed for the new paint to adhere better.
2. Prep the Surface to be Painted
Your kitchen will obviously have fixtures such as knobs, handles, hinges and cabinets. Before you start applying the paint, remove all the drawers and all the other accessories, labelling them correctly so that when you need to reinstall them, you won’t struggle. Remember that you can remove the cabinets so that you can spray paint them on the ground.
3. Apply the Primer
Priming the surface that you need to paint is an important step. All paint jobs need to be primed for that top coat to adhere better. Oil-based paints and primers have a long-lasting effect since they are water-resistant.
4. Buy Quality Paint
An adage goes that “cheap is expensive”. You will get a better finish and cover a larger area if you buy fine oils and primers. Examples of some of the best paint brands in the market include Farrow & Ball, Benjamin Moore, and Pratt & Lambert. Note that you will apply two coats of paint on the cabinets and then touch up the surface using a brush that has 2.5-inch fine bristles.
5. Decide Between Satin and Gloss
Your paint finish will lie between a colour spectrum that, on one end, has satin and, on the other hand, has a glossy finish. You need to decide which kind of finish you want. Satin is not as shiny as glossy. Most painters prefer a semi-gloss spectrum for kitchen cabinets, surfaces and other features.
6. Choose the Best Paint Colors
The colour you use to paint your kitchen is significant. Kitchen colours must give them visual impact to match the food cooked there. For example, you cannot paint your kitchen blue because no food comes in blue. Colours such as green, red and yellow complement the colour of most food items that are stored and cooked in the kitchen.
7. Measure the Size of the Surface
Before you start painting your kitchen, measure the size of the area that you need to paint. Remember that there will be differences in the amount of paint used in an empty kitchen compared to one that is fully stocked. You need to figure out the square footage of your walls so that you can determine how much paint to buy.
8. Painting an Empty Kitchen
Painting an empty kitchen is usually easy because it has been newly constructed. This means that you have not installed permanent fixtures such as locks, cabinets, drawers, hinges, handles, etc. The amount of work needed to paint an empty kitchen will range from cleaning the walls, sanding the surfaces, and power washing the debris.
9. Painting a Fully Stocked Kitchen
To paint the fully stocked kitchen, you will first need to calculate the area to be painted, and then you will need to remove the food items in the cabinet before you start removing the fixtures. You will cover the floor, remove the fixtures from the drawers and cabinets, apply the primer, and finally apply the paint. Once the surfaces are completely dry, you will reinstall the institutions and return the food items that you had removed from the cabinets and the drawers.
10. Use Rosin Paper to Cover the Cabinets
You don’t want paint splattered all over your countertops when you are painting your kitchen cabinets. You can use rosin paper to cover the countertops as you paint the cabinets. Once you’re done with painting, you can remove the paper easily. Rosin paper is very cost-effective and will help you get the right finish for your kitchen paint job.
11. Remove Fixtures
Never try to maneuver around fixtures such as hinges, cabinets, drawers, and all leather surfaces that you don’t want the paint to splatter to. It is better to remove the fixtures, do your paint job, and then return them when you are done. Some painters prefer to mask the fixtures, but this additional work is unnecessary.
12. Label the Cabinets’ Doors
There is nothing as frustrating as trying to fix a cabinet door that doesn’t fit. When you remove the fixtures before a paint job, make sure you label the cabinet doors, the handles, and all the other things so that you can do the work of reinstalling them easily. Most painters use felt pens to label the different doors and drawers before they remove them.
13. Wipe the Grease
Use home detergents to clean the grease off kitchen cabinets before you even start to apply the primer. Make sure you rinse the detergent and allow the water to dry before you can start applying the primer.
14. Don’t Overdo Sanding
Some kitchen cabinetry comes with a manufacturer’s finish. If the paint job from the previous varnish is not good enough, you can use 100-grit sandpaper to remove the bumps. Do not overdo the sanding because it may damage the wood.
15. Get a Primer that Dries Fast
Oil-based paints dry very slowly. If you want to complete your paint job in the kitchen quickly, you are well advised to use acrylic-based paints.
16. Fill the Open Grain
Some woods have open pores that show very clearly under the paint. If you are looking for an even, smooth surface, you will need to fill the open pores before you paint the surface. To fill the pores, you can either use a high-build primer or use spackling. It will be tough to fill the pores with spackling if your cabinets have moulded edges and curves.
17. Vacuum the Dust
You need to get rid of all the dust from the sanding activities using a tack cloth or a soft bristle brush.
18. Inspect the Surface for Defects after Priming
Before you start applying your coat of paint, ensure that there are no defects after you have primed the surface. Sometimes, it is grease, dents, holes and wood filler on the cabinet doors that make the surface unsightly.
We get jobs done. Get quotes from over 130,000 local businesses across Australia on ServiceSeeking.com.au
There are lots of local roof painters who can provide you with top-notch services. Take a look at ServiceSeeking.com.au’s highest-rated roof painting specialists in these major cities:
Sydney | Melbourne | Brisbane | Perth | Adelaide | Hobart | Canberra | Darwin