Customer
Does your garage floor look unsightly? You ca do it yourself, or you can hire a professional painter on ServiceSeeking.com.au to do it for you.
Just like in painting other parts of the house, painting a garage requires you first to prime the area to be painted. Since you’ll be painting the floor, it is imperative that you get an exit strategy to avoid being stuck in the middle of the painted area. You need to take more care when painting the floor by cleaning it to prevent stains once the final coat is applied.
The good thing is that you don’t have to do it yourself. You can get a professional from serviceseeking.co.au.
Getting your paint job done by a qualified and reliable tradesman will give you value for money. ServiceSeeking.com.au is a reliable database where you can get local painters who are ready to provide you with top-notch house painting services. What’s more; getting quotes from them is just a few clicks away. Try them today!
Clean the Garage Floor
- Use cloth for initial cleaning – Your garage will have some automotive fluids that need cleaning. Wipe all the liquids and then use a broom to sweep any debris left on the floor. If your floor is brand new, then you have to wait at least 45 days after the concrete has been poured so that it is cured enough to be painted.
- Use the pressurised spray to clean the concrete – You properly clean the garage floor, use a greaser to get rid of the fluids and then an all-purpose sprayer to remove all the noticeable stains. Give the floor a few mins to dry, and in case you have some lip stains, let the degreaser soak them for 20 minutes. Alternatively, you can use a laundry detergent, but never mix more than one ingredient to avoid dangerous chemical reactions.
- Use a stiff bristle to scrub – You can give the cleaner enough time to soak the stains, but do not let it dry. You will need to scrub the floor using a stiff bristle brush or broom. Never use metallic brushes, as they will leave scratches on the concrete. Repeat the cleanup process for any stains remaining after this.
- Use a high-pressure nozzle to rinse the floor – After you are done removing the stains, you can use a high-pressure nozzle such as your garden hose to wash away any remaining debris. You will need to mop any water remaining on the floor before you start applying the primer. Sometimes, you are allowed to use a high-pressure washer to mix water and the detergent and then spray the floor.
- Fix the cracks on the floor – Before you begin to apply the primer, inspect the floor to verify there are no cracks. For thin cracks, you can apply synthetic concrete, and for deep cracks, apply a new layer of concrete. Always ensure that the surface to be painted is smooth.
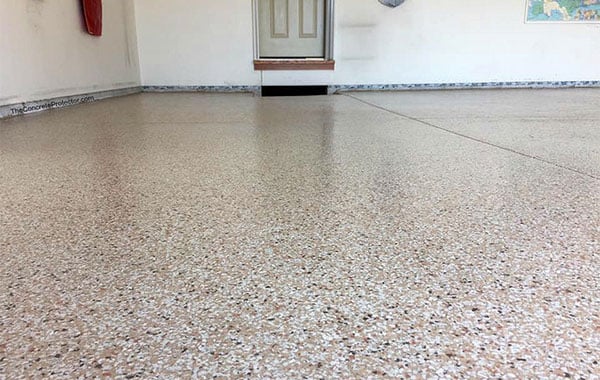
Image source: Flickr by Decorative Concrete Kingdom
Prime the Concrete Floor
- Protect other surfaces using plastic sheeting – You have walls that you don’t want to get paint that looks the same as the paint you put on the floor. You can protect the walls using plastic sheeting, drop cloths, or old newspapers. Splashes of paint or primer are very hard to claim once they dry on the walls.
- Mix your primer – Put your primer in a bucket and mix it using a paint stirrer.
- Start with the edges using a paintbrush – Pick a corner from where you can start applying the primer. Use a brush and paint around corners where the floor meets the walls. Make sure you create a boundary between the walls and the floor of about 3 inches thick before you start using a roller to paint the garage floor.
The technique of forming a boundary between the area to be painted and the areas you don’t want to get the paint splatter is referred to as cutting in. You will need to cut in around objects such as pipes and other installations on the garage floor. - Use a paint roller for the other surface – Once you have established a boundary, you can use a roller for the other parts of the floor. When you start painting, apply as much primer as you can around the edges. This ensures that you don’t have unsightly lines on your paint job.
- Prime the entire floor – Keep applying the primer as you move out of the area. Remember you need a strategy to avoid cornering yourself in the middle of the space you have applied the primer. Once you’re done using the primer, check what the manufacturers think should be the wait time until it is dry. If you’re not able to paint the same day as you apply the primer, don’t worry as long as you can do it within 30 days of applying the primer.
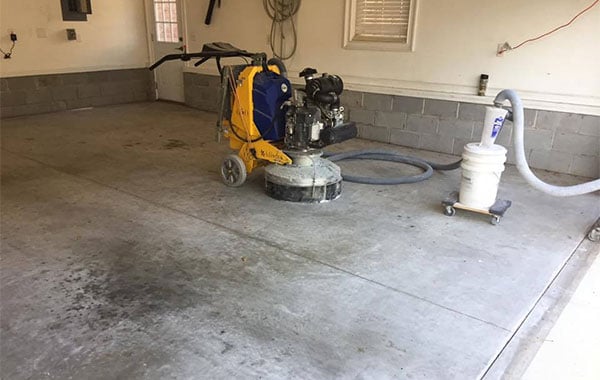
Image source: Flickr
Paint a Primed Floor
What does the paint manufacturer say about the weather?
Paint manufacturers give instructions as to when you should paint and when the weather doesn’t allow you to paint. You can save yourself a lot of trouble if you are below the instructions by the manufacturers of paint by avoiding redoing the painting just because the first coat was applied in less-than-perfect conditions.
- Mix the paint to correct colour inconsistency – Use a paint stirrer to ensure that the colour of the paint is consistent. When you’re choosing paint you can decide between epoxy and latex acrylic. If you are short on cash, you can use latex acrylic, which will last two years before you need to repaint the garage floor. Alternatively, you can use epoxy, which will last at least four years. If you are unsure which paint you should buy, you can ask your professional painter to give you advice on what is used in a standard-sized garage.
- Start to paint from a corner – Just like with the primer, paint starting from the corner, ensuring you leave a boundary of 3 inches from the edge of the wall. You may use a brush to paint the strips that separate the main floor and the walls.
- Paint strip-by-strip – Fill your bucket with paint, and then use a roller with an extended handle to reach every corner of the garage. Remember to have an exit strategy to avoid being stuck in the middle of the garage as you paint towards the door. If your roller starts getting pale, freshen it with more paint.
- Colour flakes – To liven up the base of the floor, use vinyl chips. Put chips in the bucket and then sprinkle them randomly as you paint the floor. Make sure you don’t sprinkle them later than 10 minutes because they need the wet paint to stick. You are well-advised to sprinkle the chips upwards rather than directly to the floor as this will help them to disperse over a large area.
- Apply the second coat – Give the paint at least 24 hours to dry, and then after taking a look at the output, paint the garage floor with a second coat. As long as the paint doesn’t feel tacky, you can start using your garage. Experts recommend that you should apply at least two paint coats. It’s important to note that the second coat will take longer to dry.