Customer
Check out this step-by-step guide on how to paint your house’ interior walls. With the help of professional painters from ServiceSeeking.com.au, you can turn your house into the wonderland you have always wanted it to be.

Just by painting a house, you can raise its value, transform it into an inspiring living space, and improve its value in the market. Painting will require some serious planning if you want a result worth the effort.
You need to do the following to be ready to start painting the interior of the house;
- Buy your painting materials
- Remove the furniture from the room
- Wash the walls, repair the cracks, fill the holes with spackle
- Use drop cloths or old newspapers to protect the floor from paint splatter
- Apply the primer
- Apply the paint with brushes and rollers
Unfortunately, doing the paint job yourself is not the most cost-effective method to get value for money. Instead, get your paint job done by a qualified and reliable tradesman from ServiceSeeking.com.au, a reliable database where you can get local painters who are ready to provide you with top-notch house painting services. What’s more, getting quotes from them is just a few clicks away. Try them today!
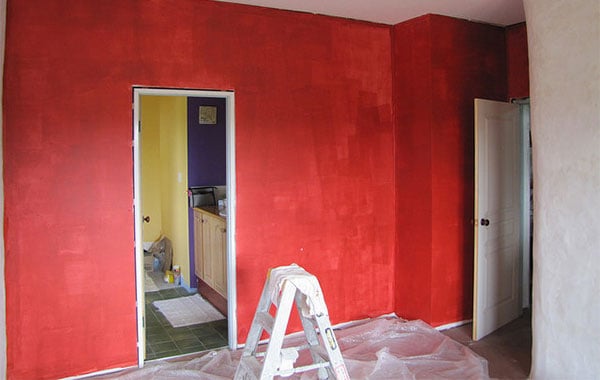
Image source: Flickr
Preparation for Painting the House Interior Walls
Write down your thoughts
- Which colour do you want for your house?
- Do you want the sunlight to filter into the rooms?
- What colour of paint will you apply on the trims, ceiling, doors, etc.?
Light vs. dark colours
Light colours can work in any room but that colours will need a lot of natural lighting to filter into the room. If you’re painting the basement, blue might seem like a good colour, but it will turn the room into a dungeon that is too dark.
Use neutral colours
If you’re painting the house in preparation for sale, you are better off sticking with neutral colours which can match any furniture or decoration that the new owner might come with.
Use digital photographs
If you’re tech-savvy, you can take pictures and examine the colours of your room using the photo editing program. This ensures that you know exactly how your room will look like once the paint job is done.
Be bold with the colours
Get creative with the colours. You can even paint murals, and if you don’t like them, you can paint something else. Ensure that the colours that you use are what you had in mind when you started painting the interior walls of your house.
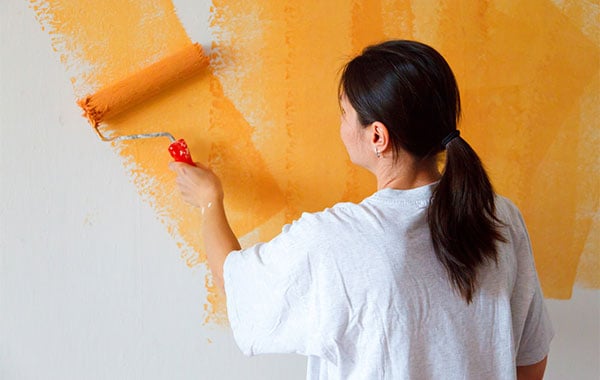
Image source: publicdomainpictures.net
Use complementary colours
If you have rooms that are next to each other and open to each other, you can use similar shades of colour so that you can have a neat effect.
Determine the gloss you want
While shiny gloss might be easy-to-clean, it will clearly show any blemishes on your walls. On the other hand, flat paints can hide the flaws but are more difficult to clean.
Use glossier paint in places such as kitchens and bathrooms where there is a lot of steaming and cooking as well as in high-traffic rooms. Use flat paint on ceilings and large walls that don’t need a lot of cleaning.
Consult the family members
You probably have a family that has interest in the colour of paint you apply to your interior walls. Ensure you get their concurrence before you start applying the paint.
Measure the area to be painted
You need to calculate the area that you need to cover during your painting project. Get all the products of length by width. You can then subtract the areas of any door or window that doesn’t need to be painted.
Next, you need to determine the amount of pain that each of the areas will need including the old walls, the angled ceilings, the trims, etc.
| The area to be painted | Formula |
|---|---|
| Basic wall (F) | F = Breadth x Height |
| Wall with windows | F = B x H – [(winB x winH) + (winB x winH)] |
| Wall with angled ceiling | highH x B = a (highH – lowH) x B = n F = a – n/2 |
| Wall with an angled ceiling and a window | (a – n/2) – (winB x winH) |
Prepare the budget
Your painting project cost will vary depending on the quality of the paint and the price. It can also change because different painters charge different rates. Below are the things that you need to factor in when you are preparing the budget for your painting project:
| Budget Item | Questions to ask to determine the cost |
|---|---|
| Paint |
|
| Primer |
|
| Painter |
|
| Painting tools |
|
Schedule the work
You will need to understand how long the project will take. The work involved in a painting project includes moving the furniture, preparing the wall and cutting in, painting, lunch breaks, cleaning up the surface, bringing back furniture and clearing the site.
You need to allow enough time for all these activities. Food thing in mind that no project ends without unforeseen activities. Do not try to fit all the activities in one day. If you finish the work ahead of schedule, great!
Plan the workers you’ll need
You will obviously not have to plan the workers if you hire a professional painter. He will do the work for you. There are many activities to be planned, including preparing the surface, moving the furniture, covering the floor, cleaning and even preparing the meals for the workers. Below are a few key personnel you will need during your painting project:
- Cutters – You will need an experienced hand to paint the edges around the ceiling and wall corners. Ensure that the cutter you give this job is properly skilled to avoid doing a poor, wavy, and jagged job. Cutting in is a skill learnt on the job by professional painters.
- Trimmers – Trimming is an activity that requires skilled tradesmen. The trimmers will trim the enamel on windows, baseboards, and door frames.
- Project coordinator – This is the person who will take care of the needs of the workforce, including fetching drinks, making sandwiches, rushing to the store for last-minute tools, arranging for dinner and lunch, making phone calls, getting directions, washing the brushes, etc.
- Rollers – Rollers are the people who will do the painting after the cutters and trimmers have done their work. You don’t need a lot of them as they can cover the ground very quickly.
- Caulkers – These are the people who will do the repairs on the holes by filling in the cracks with spackling. Remember that the job must be done before you start painting, and the sparkling must be allowed enough time to dry.
Empty the rooms
You cannot paint any room with furniture lying along the walls. You can either move the furniture to the middle of the room or rent a storage space before you can start painting the walls. Apart from the table and the paint cans that you’re going to use, everything else should be removed from the room.
Painting the Interior Walls
Prep the house
The following activities that you will need to conduct when preparing the house for painting:
- Wash the walls
- Remove wallpaper
- Patch the cracks and fill the holes with spackle
- Seal the stains
- Sand and dry the surfaces before you attempt to paint
- Apply painter's tape for trimming
- Lay the drop cloths
- Buy your paint on time
- Open the windows for ventilation and faster drying. It also helps the workers to avoid airborne fumes
Prime the surface
The following are the activities we will need to undertake on the surface in preparation for painting:
- Apply primer on dark colours, stains after they have been sealed, and unpainted surfaces
- Apply two coats of primer to ensure an even surface over the window sills, switches and door frames using painter's tape.
- Primer prevents lumps on the wall and paint peeling by enhancing paint adhesion.
- The primer also prevents the stains from bleeding through the paint
- Priming is necessary if your new paint is lighter than the one that was there previously or you are painting on a drywall
NOTE: Most paint stores have white primer as well as tint primer, which are sold at no extra cost. The tinted primer is manufactured to match the finished coat as closely as possible.
Start Painting
- Always start with the most challenging room
- Using a two-inch angled brush, start by painting your corners and around the trim
- Paint a border of at least 2 or 3 inches from the edges, doors, and moldings
- Use an angled brush to ensure the paint is evenly spread on the walls
- Use a roller to paint the walls after the trimmers have done their job
- Remove the painter’s masking tape when the paint is wet, as removing it while it’s dry can pull the paint off the wall
Clean up
- Ensure all your materials are cleaned and properly disposed of
Take care of the floors after walls
- If you plan on changing the floors, do them after the walls. You will make a mess when painting an entire house. You don’t want paint on your new carpet.
Compensate your workers accordingly