Fencing
Did you know that you could save both time and money if you use a compressed air sprayer to paint your home? Check out this guide that details how you can use the sprayer effectively.
A compressed air sprayer is one of the essential tools that a painter should have. It saves both time and money and also bypasses the pollution that might be caused by aerosol propellants. Follow the following instructions to use the compressed air sprayer:
How to Prepare Before You Use the Air Sprayer to Paint
Choose the paint and the thinner to use – although the compressed air sprayer is mostly used with oil-based paints, it can also be used with latex and acrylic paints. To improve the viscosity of the pens, you will need to add a thinner, which allows the solution to flow freely through the metering valve and onto the nozzle of the sprayer.
Mask the surfaces you don’t want to be painted – you are allowed to use a drop cloth sheeting plastic or other material to cover the ground and furniture when using an air compressor sprayer. Alternatively, you can use old newspapers or a painter's mask to cover items that you don’t want the oil splatter to fall on. If you’re painting using a sprayer during a windy day, ensure you’re facing the direction the wind is flowing.
Wear protective gear – Gloves, safety glasses and a respirator. Protect yourself from dangerous fumes and particulates by wearing protective painting gear.
Prep the surface to be painted – Some of the things that you need to do before you start painting include brushing, sanding off the rust, wiping off the oil fluids, removing corrosive metal, etc. After this, you need to wash the surface using spirits, soap and water. Rinse the surface thoroughly and ensure it is completely dry before you start applying the primer.
Apply the primer – You can apply the primer using either the sprayer, the paintbrush, or the roller. When you are done applying the primer, find the surface to ensure it is smooth in preparation for the paint.
Prep the Compressor
Put on the compressor – it is advisable to use air and primer to test your sprayer. Put on the compressor so that pressure can build up when you get your paint ready for spring.
The compressor must have a regulating knob that helps you adjust the level of pressure as appropriate. You don’t want fluctuations to occur when you are spraying because the pressure rises or falls, resulting in uneven paintwork.
The appropriate pressure reading should be between 12 and 25 psi (pounds per square inch). Make sure you read the manual of the compressor so that you can adjust the levels of pressure to the appropriate reading for your painting work.
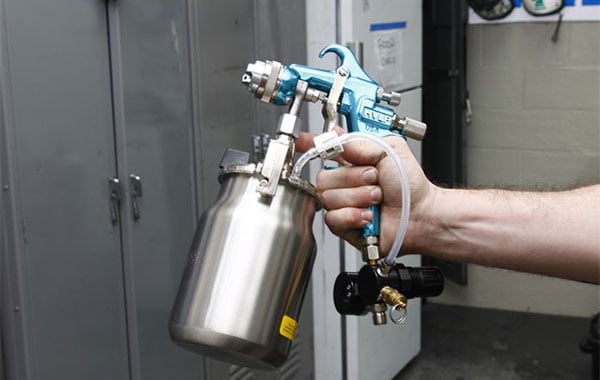
Couple the air hose to the sprayer – attached to the sprayer and fasten the ring around the hose so that you can make it airtight. Use the Teflon tape to create an airtight seal around the connection between the air hose and sprayer.
Put some thinner into the paint cup – At the bottom of the sprayer is a can connected to the spray gun that acts as a paint reservoir.
Turn on the metering valve – This is the lower screw that is just above the pistol grip of the sprayer.
Test the sprayer – Aim the nozzle to the paint bucket and squeeze the trigger to test if it is working. It will take approximately one minute for the paint to get through the sprayer system.
After a few minutes, you will start seeing the paint thinner flowing from the nozzle. If the paint doesn’t begin to flow from the nozzle, you will have to disassemble the sprayer and check for loose seals and stoppages that might be stopping the paint to the floor.
Pour out the thinner from the sprayer – The most common thinners for paint are turpentine and mineral spirits. They are very flammable solvents and should only be stored in their original containers.
How to Paint With the Air Sprayer
Ensure you have enough paint for the project – Before you start your painting project using an air sprayer, ensure that you have prepared all the things that you will need during the painting.
Once you open the can of paint, mix it thoroughly with the thinner and allow it to settle for a few minutes. It is important to remember that paint cannot be stored over a long period as it starts to get some lumps. If you leave the paint inside the pump, it will begin to harden, and this has an adverse effect on the effectiveness of the pump.
Use appropriate thinner to thin the paint – All paint manufacturers have the recommended thinner use on the paint. For you to get a good flow on the sprayer, dilute your paint by 15:85 (15% in the thinner and 85% being the paint).
Fill the paint cup about 2/3 and couple it to the sprayer – You should feel the cup of the sprayer to 3/4 full. Be sure to fasten the screws securely so that you have enough pressure when you press the trigger to paint.
Spray from about 5–10 inches away from the surface – The best practice is to be at least 5 to 10 inches away from the surface that you are painting. Use the up-and-down shipping motion when painting parallel to the surface. If you’ve never used the sprayer before, make sure to test the balance and the weight of the sprayer before you start using it on the real surface.
Keep the sprayer moving as you squeeze the trigger – When the trigger is squeezed down, keep the sprayer moving so that you can avoid making drips and runs over the surface where you are applying paint. Before you start applying paint on the main surface, test the sprayer on a piece of cardboard so that you are sure that the paint is coming out as required.
Paint twice on each pass – You are required to paint twice on the surface so that you can avoid leaving thin spots on your paint job. Be on the lookout for drips and runs, especially when you’re moving fast.
Refill until you are done with the project – Never let the paint lie idle in the sprayer’s cup. If you want to take a break, pour some thinner into the sprayer and get rid of the paint within the system. You can then refill the sprayer’s cup once you are ready to resume work.
Let the paint dry before applying the second coat – As always, remember to give the paint enough time to dry before you can apply the second coat. Sanding in between the court is recommended so that you can remove glossy paints to improve the output of your paint job.
How to Clean Up the Sprayer after Painting
Empty the unused paint from the can – The most important thing to remember here is that anything that you pour from the can has already been thinned. This means that the next time you need to use the paint, you do not need to dilute it again using the thinner. Epoxy paints that are usually catalysed using a thinner cannot be returned to the original cans.
Clean the siphon tube and the paint cup with thinner – remember to wipe off any excess paint left in the sprayer cup.
Slosh the thinner around the sprayer – By sloshing the thinner inside the sprayer. You will be getting rid of the paint that is left inside the system.
Remove the drop cloth and masking tape from your work area – As soon as the paint has dried, remove all the protective material that you had installed during the painting project.